Sunday, November 30, 2014

The Sad Saga of Christmas Breakfast: Sweet Potato and Ham Hash with Corn Crepes

I love fancy breakfasts (especially when they’re served to me at a great restaurant with bottomless mimosas and a copy of the Sunday newspaper). But now that fancy breakfast involves finding a babysitter and someplace that can accommodate my husband’s complicated dietary restrictions, it’s a lot more likely to happen at home.

The story of Christmas breakfast really illustrates how complicated things have gotten. For years, my mom made scrambled eggs with cream cheese, Canadian bacon, and fresh croissants on Christmas morning; and when I moved out and had my own home, that was the breakfast I made on Christmas. It was a Very Big Deal.

The year my daughter was old enough to eat solid food, she developed an allergy to eggs. I was sad, but not so sad that I was going to start making two breakfasts (and I try not to make anyone have to fill up on side dishes at my table, even the two-year-old). On to Plan B, an outstanding recipe for yeast-risen waffles. They were perfect waffles: crispy on the outside, creamy on the inside, with just a little tang. They became the new Christmas tradition.

Then my husband developed a severe gluten intolerance. Sigh. On I went to a bell pepper/onion/thyme mixture, sauteed in butter and finished in the oven with an egg on top (the kids skipped the eggs) and some hash browns. When my husband cut dairy out of his diet to further manage his symptoms, I switched to olive oil.

After a couple of years, he stopped being able to tolerate nightshades – no potatoes, tomatoes, eggplants, or peppers.  That year, I made a batch of scones and sat in the kitchen eating them by myself. I might have cried. I think the rest of the family had oatmeal.

Then I found this marvelous sweet potato hash recipe, which almost everyone likes (I’ve lowered my standards and let my son fill up on fruit and bacon if he wants). I was procrastinating on a project this weekend, so making an elaborate breakfast seemed like a really good idea, and we were still dealing with odds and ends from Thanksgiving dinner. This recipe was the end result.

Both recipes are based on ones found in Edon Waycott’s Breakfast All Day, which makes me want to move to California so I can live down the road from a fig stand and crash her house for meals.

Sweet Potato and Ham Hash

2 large sweet potatoes, peeled and diced (3/4 inch is just about right)
2 shallots, peeled and chopped (feel free to substitute an onion if you don’t have a shallot on hand – no need to be a purist about hash)
2-3 slices ham, roughly chopped (this is where you have to start using your judgment – the Christmas ham slices are a lot bigger than the odds and ends in the deli drawer of my fridge. Shoot for a cup or so of ham pieces and adjust to your own preference)
Olive oil
Thyme
Salt and pepper

This is a great time to pull out that non-stick pan you’ve been ignoring after falling in love with cast iron. Heat a decent-sized splash of olive oil in the pan over medium-high heat and add the sweet potatoes. Turn them a few times to make sure they all get some oil on them, then let them cook for a few minutes undisturbed.

After about 5 minutes, turn the potatoes gently and lower the heat a little if needed. Ignore them some more. Decide what else you’re going to have with this; a poached egg on top is just great.

In another 5 minutes, check the potatoes. Are they starting to get a little soft? Great! Add the ham and shallots, stir everything up, and sprinkle a little thyme, salt, and pepper on the mixture. Cook this until the onions are soft and the sweet potatoes are tender but not mushy, usually about another 10 minutes (most of which you’ll spend doing something besides paying attention to this pan). The ignoring part is really important; if you stir them a lot, they’ll turn into a chunky sweet-potato-and-ham mush – which is, admittedly, delicious as well.

Ah, you want the deluxe version? I made corn crepes to go along with the hash, again based on Edon Waycott’s recipe. We don’t do gluten, so I used a pre-made blend we’ve been experimenting with; and I keep forgetting to buy more cornmeal so I used corn flour. This wrought havoc on the flour-to-water ratio and I learned a few lessons about crepes.
  1. Use a non-stick pan.
  2. Brush the pan with oil (or butter, if you’re lucky enough to be eating dairy) between each one
  3. Don’t walk away to answer the door, even if it's your friend bringing you a Coach purse
  4. The batter should be thin enough to pour but not so watery that the batter never sets
  5. You’re going to throw away the first few crepes
  6. Puns about crepes are not funny to anyone except you

Cornmeal crepes

1 ½ cups almond milk
3 eggs
½ cup GF flour mix (we’re using Namaste brand Perfect Blend, which is a bit of a moisture hog)
1/2  cup corn flour (if you have cornmeal in the house, by all means try it – and please let me know how it turns out)
1 teaspoon sugar
Pinch of salt

Put all the ingredients in the blender and mix until well-combined. If it’s the consistency of cake batter, add a little more almond milk and mix again. Recall that you’re not actually developing the gluten in the flour – which you would if you were using flour – so you’d have a really hard time over-mixing this. It’s one of the few compensations of gluten-free baking.

Heat a 6-inch non-stick pan over medium heat. Brush the pan with a little oil or butter, then pour in about 3 tablespoons of batter and tilt the pan so the batter spreads out very thinly. This sounds really easy but the first few might make you lose confidence in yourself…. Move fast and don’t worry if they turn out thicker or don’t fill up the whole pan or whatever. They’re going to tasty and that’s really what counts.

When the top of the crepe sets, flip it over and cook until the bottom of the crepe is lightly browned. Fold the crepe in half and transfer it to a plate, then repeat. Once you get the hang of it, this part goes very quickly.

To serve:
Put about ¼ cup of hash in the crepe and fold it over. Top with cranberry-orange relish (my father-in-law’s recipe – I’ll see if I can pry it out of him) and drizzle with crème fraiche. Sprinkle with rosemary Falksalt.

OK – about Falksalt: Go buy some. I discovered it a few weeks ago and I’m putting it on EVERYTHING. The big crystals are crunchy and they look beautiful, and the flavored varieties are just amazing on so many things (including some I didn't take pictures of, really): 


Deviled eggs with black Falksalt


Roasted sweet potatoes with hazelnut oil and citron Falksalt (and drizzle it with creme fraiche before you eat it - OMG)


My new favorite toy (and a silver salt cellar - how cool is that?)

Wednesday, October 15, 2014

You're Just Going to Have to Trust Me on This One, Part 3: Carrots. And Chocolate. Really.

We’ve eaten a lot of very ordinary food lately. The school year has been kicking our collective butts and we’ve gone back to many of our usual weeknight favorites, even though I’m continuing to moon over my recipe file and daydream about the amazing dinners I would cook if only I had more time (Really? Who am I kidding? I have the day off work and I just ate EasyMac for lunch). But then a recipe like this pops up and reminds me that fabulous doesn’t have to mean a lot of work, even if that’s how it usually works out around here.

I first discovered Mindo Chocolate Makers at a tasting event at Michigan by the Bottle, and Cortney posted this recipe on the MbtB website at some point. We’d been buying a lot of multi-colored carrots from Trader Joe’s that month and I had some fresh mint laying around from a batch of mojitos I never got around to making (isn’t that sad? August was clearly far too busy), so this was just the right combination to jazz up a weeknight grill dinner. Miel de Cacao is a really fantastic ingredient in all sorts of ways – it’s ended up whisked into salad dressings and drizzled over fruit, and it’s made more than one appearance in a couple of outstanding martini-ish things, and really it makes itself at home anywhere you put it.  


By all means, follow the link to the original blog post overat Earthy Delights, which is so much more beautiful and well-written and well-photographed than mine. The shortened cheater’s version is here.

Carrots! Chocolate! (Really!)


1 lb carrots (the multi-colored pack you get at Trader Joe’s or the organic food section at Western Market look really nifty in this)
Olive oil
Salt and pepper
2 tbsp miel de cacoa (So. Amazing. Go buy some right now.) 
Handful of fresh mint leaves, sliced very thinly (chiffonade, if you’re feeling technical)  

Fire up your grill for whatever else you’re having for dinner. Scrub the carrots, trim off the tops if needed, and toss with a little olive oil and some salt and pepper.

When the grill is ready and/or the rest of dinner is about 20 minutes from being done, put the carrots on the grill (do I even need to point out that these should go crossways?) and cook. Turn them fairly often so they cook evenly; they’ll be a little bit brown and nicely tender when they’re done. (Grilled carrots are really excellent even without the miel de cacao and mint, btw.)

Arrange on a serving platter. Drizzle the miel de cacoa across the carrots and sprinkle with the mint. Tell your carrot-loving kids you’re serving them chocolate with their vegetables  and enjoy the mixed reactions. This would also be a very glamorous thing to serve guests with a mixed grill dinner. 

Thursday, October 9, 2014

You’re Just Going to Have to Trust Me on This One, Part 2: Everyone Loves Okra

Okra has a bad reputation, even for a vegetable. “Slimy.” “Ropy.” “Gelatinous.” “Eeeew, what is that?!” Okra’s heard it all (the technical term is “mucilaginous,” btw). Wondering what those slimy grayish-green rounds in your gumbo could be? It’s okra, exuding all that ropy gelatinous goodness so that your gumbo isn’t soup instead. Expecting a hush puppy on the buffet? Ha ha ha – it’s deep-fried OKRA, cut into deceptively hush-puppy-shaped pieces just to make you sad.

If you’ve eaten it, you have an opinion – love it or hate it, nobody feels “meh” about okra. I once took a huge gamble and served it to a dinner guest without clearing it first. Luckily he was originally from Texas and was completely delighted that I’d somehow figured out he loved and missed the okra his mom used to make. This is not a gamble I’d usually recommend taking. Except….

Except for this recipe. It’s good, and it’s simple, and it’s practically foolproof. I’ve only messed it up once in 6 years, and that was because I overcrowded the pan. Even then it was still good, just not as sublimely, supremely tender as I’d become accustomed to. There are never leftovers, no matter how much we make. It’s an Indian recipe but it goes with all sorts of things, especially things from the grill, because the spices aren’t overwhelming. Trust me on this – you love okra.

Adapted from Madhur Jaffrey Indian Cooking, my first Indian cookbook (and still one of my favorites; thank you, Donna!). Use a big cast iron skillet for this and cleanup will be much easier.

Indian Okra with Onions


Canola or other neutral oil
1 tsp whole cumin seeds
1 lb. okra, cut into ½-inch rounds
1 medium onion, chopped
½ tsp salt
1 tsp ground cumin
1 tsp ground coriander
1-2 tsp lemon juice


Heat at least 6 tablespoons of the oil in a large cast iron skillet over medium-high heat. When the oil is hot, add the cumin seeds and let sizzle for a few seconds, until the seeds turn dark and start to smell fragrant. Add the okra and onions and spread out in an even layer in the pan. Cook for about 10 minutes, turning the okra carefully every few minutes. Once the onions start to brown, turn the heat down to medium and cook for another 5 minutes or so. Add the salt and spices, stir carefully, and cook for another 5 minutes, stirring occasionally. The onions should be very soft and golden brown and the okra will be tender and toothsome (not at all slimy!).

You can hold this for about 10 minutes on the stove before serving, but don’t let it sit too long. You can also double the recipe, but make sure that you’re using a large skillet; crowding the pan will give you slimy okra and then you won’t trust me anymore.


Thursday, October 2, 2014

You’re Just Going to Have to Trust Me on This, Volume 1: Fish Pilaf


I’m going to admit up front that there’s just no way to make this dish sound even remotely tempting when you talk about it. I’ve mentioned it to several people and, depending on how well they know me, they’ve made the yuck face with varying degrees of politeness. I asked someone for a wine recommendation recently and his first response was, “Wait – what?!” So I’m going to ask you to take a leap of faith and try this, because it is so very tasty and fish is good for your brain.


According to Wikipedia, “Pilaf….is a dish in which rice is cooked in a seasoned broth.” Spices and vegetables and some kind of protein are often assumed or implied, but by this extremely broad definition even Rice-A-Roni is a pilaf. You’ve probably already eaten Rice-A-Roni at some point and you survived, so this will be a step up from that. Doesn't that inspire a lot of confidence? 

My son is an avowed Fish Hater, but he’ll eat seconds and thirds of this. The original recipe calls for a whole fish and making broth using the head and bones. Nope. My version is pretty streamlined; you can manage this on a weeknight if you have a good relationship with your kitchen timer, since there’s very little hands-on work involved and it only takes an hour from start to finish (yes, I consider this a reasonable amount of time for dinner prep now that we're no longer allowed to buy anything convenient). The entire recipe breaks down into timed increments, so if you need to do one part and then oversee the math homework and do another part and drive someone to swim practice and do another part and deal with the daily reading log and fold a load of laundry so somebody can wear his only green T-shirt at the school Fun Run and do another part and pick someone up from swim practice, you can manage it without ruining dinner and still eat more or less on time. If your weeknights are anything like my weeknights, that is.

About that wine recommendation: After Lewis got over being freaked out by the weird recipe, he picked out a great wine for this. It was on the dry side and just a little bubbly – not champagne bubbly, just a little sparkly. It went really well with the richness of the rice and the creaminess of the pine nuts without overwhelming the fish. Three cheers to Lewis! He also picked out a really wild Lebanese beer with sumac and thyme and mint and such, but I haven’t had a chance to try it yet. I’ll keep you posted.

Adapted from The Food and Cooking of the Middle East by Ghillie Basan. And OMG, I just realized she has a ton of other cookbooks and now I want them all! 

Poached Fish with Rice and Pine Nuts

3 tablespoons olive oil
2 onions, peeled and thinly sliced
2 lb any firm-fleshed white fish. We’ve made this with trout and cod and both were very good.
1 bunch parsley
3 bay leaves
1 cinnamon stick
1 teaspoon black peppercorns
1 ¼ cup long-grain rice, rinsed and drained
2 tsp ground cumin
1 tsp ground cinnamon
Small handful of pine nuts
1 lemon, cut into wedges

Heat the olive oil in a large skillet and cook the onions, stirring often, until they turn dark brown. Set aside.

While the onions are cooking, put the parsley in the bottom of a large pot or Dutch oven. Place the fish on top of the parsley, add the bay, cinnamon stick, and peppercorns, then add enough water to cover the fish. Bring a boil, then reduce the heat and simmer 5 minutes.

Remove the fish from the pot, break it into bite-sized pieces, and set it aside. Bring the liquid back to a boil and simmer until it’s reduced by about half, which should take 20 minutes or thereabouts. If you’re used a milder-flavored fish, you might want to add a fish bouillon cube or a few splashes of fish sauce (or soy sauce) to give it a little more depth of flavor.

Add the browned onions to the stock and simmer another 10-15 minutes. Strain the stock into a large measuring cup; you should have 2 ½ cups of liquid (add a little water if needed). Return the stock to the pot and add salt and pepper to taste. Return it to a boil, add the rice, cumin, and ground cinnamon and simmer it for 10 minutes.

When the rice has absorbed the stock, take it off the heat, cover the pan with a clean dish towel, and put a lid on it. Let it stand for 10 minutes while you lightly toast the pine nuts.

Put the rice into a serving dish. Mix about half the fish into the rice and sprinkle the rest on the top. Garnish with the pine nuts and lemon wedges.


Saturday, September 6, 2014

Where Ya Been, Jen?: Sweets and Beets Chopped Salad from the Depths of a Busy Summer

You may be asking – where ya been, Jen? Given the fact that the Swim Team Ate My Summer, we took the month of August to cram in all the trips that we didn’t take in June and July: the Theta Tau Not-Canoe Trip, the annual Escape from the Dream Cruise Trip, and a jaunt up to our beloved Leelanau Peninsula (alas, not long enough!)(plus we started the month off with a sort-of engagement party and a hailstorm). We were busy. I had grand plans for blogging a recipe from each of our wonderful busy weekends but then I didn’t, and I know that you will all get over it.
As lazy as I was this summer, I should have spent more time here

The theme of the last few months has been Lower Your Standards. There are all sorts of things I adore doing properly, but I’m trying to embrace a more laid-back sense of perspective about things (and amazingly, we all survived). And while my house is a disaster, our party involved a real live caterer for the First Time Ever, and I wake up at night freaking out about the things I’ve left undone, we’ve also managed to start the school year with nary a hiccup and everyone in the family still likes each other after a completely unprecedented amount of time together in the last 30 days. This is no mean feat with a tween in the house.


Nonetheless, the official end of summer seemed to call for some sort of celebration, so we invited one of my favorite cousins over to dinner on Labor Day and I threw this salad together with roughly half the ingredients, which happened to be what I had on hand. Properly done, this particular salad is one of my new go-to dishes of the year – but even the half-assed version is pretty darn good. Don't have avocados? Skip them. Only have cannellini beans on hand? Swap them for the chickpeas. This has lots of layers of flavors, it's hearty enough for a main dish, and it makes a great lunch the next day. All main dish salads should be this flexible and delicious. 

This is the original version (with husband-friendly modifications) from the summer edition of Simply Gluten-Freemagazine – with is simply the BEST GF magazine I’ve ever come across. Might I respectfully suggest a subscription? 


4 small beets, trimmed and scrubbed
1 large sweet potato, peeled and diced
Extra-virgin olive oil
½ teaspoon ground cumin
5 ounces baby spinach or other leafy green, chopped
1 can chickpeas, drained and rinsed
½ cup sliced scallions
¼ cup pitted and chopped dates (seriously, don’t skip this - it makes the salad)
3 tablespoons minced fresh mint or 1 teaspoon dried
3 tablespoons lemon juice (worth juicing the lemon to get the real deal)
1 garlic clove, crushed
Big pinch sea salt
½ ripe avocado, pitted and diced
2 hard-boiled eggs, peeled and chopped


Preheat the oven to 400ºF. Wrap the beets in a large square of foil, then place on a baking sheet and roast for 50 minutes. Unwrap the beets and let them cool, then peel and dice. 

While the beets are cooling, toss the sweet potatoes with 1 tablespoon of the olive oil and sprinkle with cumin. Roast for 15 minutes. Turn with a spatula and roast for 10-15 minutes more, until tender. Cool.

Toss the beets, sweet potatoes, and remaining ingredients together in a large bowl. 
  

Thursday, July 17, 2014

Did I Mention Picnic-Obsessed? Pork and Apple Koftas

Now that we’ve given up on packing healthy picnic dinners for swim meets – and now that swim season is very nearly over anyway – we’re onto packing healthy picnic dinners for evening concerts at the zoo. On Wednesday evenings during the summer the zoo hosts concerts with a variety of local musicians, although mostly we just look at it as an excuse to have yet another picnic dinner and walk around looking at the animals after the worst of the day’s heat has passed. We invariably run into people we know (last week, a friend and 2 cousins from different sides of the family). These events have also gotten more fun since they opened up a beer tent, but you didn’t hear that from me….

The view from my front window
Let me take a minute here and do a shameless plug for the zoo; it's one of the many things in the metro Detroit area that really doesn't get credit for being as extremely awesome as it is. Since I have kids and we like to go on vacations, we've been to a fair number of zoos in the last decade. I would compare ours favorably to just about all of them. They've added some great events and updated the animal enclosures and generally made it a very nice place to spend a day; and by adding this concert series on weeknights, they've given all the busy working parents a way to hang out there without the crazy weekend crowds. I also live across the street from the zoo, so it's been nice to have somewhere to walk without having to deal with cars and traffic and such; I walked there with Anna every single week the winter after she was born (winter is a great time to go - the animals are very active and the docents will tell you all sorts of juicy stories. At one point I knew waaaay too much about the polar bear love triangle). 

This particular recipe is a variation on what we refer to as “Anna Kabobs” and most cookbooks would call “shish kafta.” I’d love to attribute this to whoever created it, but I can’t find the link David sent me and the printed page doesn’t have any source information on it. It’s even less effort than our usual lamb version, and it cooks up just fine in a skillet if, for some mysterious reason, you actually don’t have the time or inclination to light your grill, cook your dinner, and pack it up to eat somewhere else. If you’re lucky enough to be picnicking somewhere that has a grill, make these up in advance and you will be a Picnic Superhero.

Pork and Apple Koftas

1 lb ground pork
2 cloves of garlic, crushed, or 1 teaspoon jarred garlic paste
¼ cup applesauce (the individual serving-sized cups are perfect for this)
1 bag cabbage and carrot coleslaw (or chop your own)
3 (or more) tablespoons mayonnaise
Splash of lime juice

Mix the pork, garlic, and applesauce together, then shape around skewers (this recipe should give you 12). If skewers feel too fussy (or you’ve forgotten to soak them)(or you’re making these in a skillet), shape the meat as you would if there was a skewer involved. Or into a meatball. Really, it’s a picnic – anything in an easy-to-pick-up-without-utensils shape is fine.

Start your grill or heat your skillet and brush it with a little olive oil. Cook the meat for 8-10 minutes, turning several times, until well-browned and cooked all the way through.
In the meantime, mix the coleslaw with the mayo and lime juice, adjusting to taste.

Serving suggestion: get some of the garlic dip they serve at Middle Eastern restaurants (our local fruit market carries it in the refrigerator case) and serve it with the koftas. The coleslaw really does make a difference here, so don’t be tempted to skip it – it goes very well with this dish.


Thursday, July 10, 2014

Chop Chop: a Main-Dish Cabbage Salad for Picnics

For 3 months of every year our entire lives revolve around the city swim team, which includes daily practice and 1-2 meets per week once school lets out. We’re champion picnic-packers, so I think it’s just a little sad that we finally bowed to the ceaseless badgering and started letting the kids buy food at the concession stand during meets. There’s a “healthy snacks” table but really they’re all about chili cheese dogs and Gatorade and Ring Pops for dinner. (I just keep reminding myself of the mantra of toddler parents: It’s what they eat in the course of a week that counts….)

Possibly I’ve mentioned previously how very much we love our picnic basket? After experimenting with a few different types, we settled on a rolling suitcase sort of thing, complete with a telescoping handle. A second case attaches to the front of the insulated cooler part, and contains plates, silverware, wine glasses, cloth napkins, a cheese board, salt and pepper shakers, and so on. It’s nice not having to scramble around looking for paper plates before we leave or figure out how to serve something with no spoons, and the amount of garbage generated at any given picnic is minimal; also we feel very glamorous and well-prepared for any picnic eventuality.

This picnic cooler sees some pretty intense usage over the course of the summer including – until very recently – at swim meets, where we would pack more-or-less the same dinner we’d be eating at home. As a result we have a pretty extensive repertoire of picnic-friendly foods, main dish salads, and such (including one that I love so much, I blogged it twice)(oops). This particular recipe has appeared on our dinner plates no less than 5 times in the last month, as it’s an excellent base for just about anything you have hanging around in the fridge or pantry as well as being a great side dish as-is. I’m posting it in honor of the last swim meet of the regular season, which is tonight (and which will *not* feature this salad; see above re: concession stand and chili cheese dogs).

A note about the cabbage: Fer cryin’ out loud, just buy a head of cabbage and cut it up. It’s not that much work, and the pre-shredded stuff in packages always tastes like the cabbage equivalent of iceberg lettuce. This has never lasted more than 24 hours in our house, but I expect that it would keep reasonably well for the better part of a week.

As are so many other favorite recipes, this is from Mark Bittman; in this case, “Food Matters: A Guide to Conscious Eating,” which is also a very good and accessible read on healthy eating that isn’t preachy.

Chopped Cabbage Salad

1 small head cabbage, cored and chopped (not necessarily shredded, just chop it like lettuce)
2 stalks celery, chopped
2 carrots, chopped
½ red onion, minced
1/3 cup olive oil
2-3 tablespoons vinegar or lemon juice (white wine vinegar or similar is very good here)
Salt and pepper

If you have time, put the cabbage in a colander, toss with a couple of teaspoons of salt, and let it sit for an hour or so, pressing once or twice to get the liquid out. If you haven’t planned that far in advance, feel free to skip this step.

Combine all the vegetables in a bowl, grind some pepper over the top, and toss with the olive oil and vinegar. Check the seasonings and adjust to suit your own taste (if you salted the cabbage previously, it’s almost certainly salty enough).

Other things we’ve put on this salad: avocado; leftover chicken; canned chickpeas; feta cheese; peas; any other leftover veggies in the fridge, including bell peppers, radishes, and tomatoes. We’ve also thrown it into pita bread with shawarma. You could try different kinds of oils and vinegars to change the taste, though we’ve been very happy with it as is.  


Wednesday, June 25, 2014

It Ain’t No Corn Dog: Crabby BLTs

People often ask, “But what do you eat?!?!” when they hear David’s list of dietary restrictions. Our answer is usually, “Everything else!” because there really is an enormous world of food to choose from.  Gluten really isn’t even the biggest problem anymore; it’s much harder to avoid paprika and potatoes.

When, exactly, did they get so grown-up?
We were feeling especially deprived during our picnic lunch at the zoo last Sunday, which featured these sandwiches, the brainchild of my physical therapist Stephanie. I don’t know if this is something she’s eaten at a restaurant or her own decadent genius suggestion, but we certainly felt bad for everyone eating corn dogs and nacho chips for lunch that day. Our picnic cooler comes equipped with plates and silverware and cloth napkins, so we dined in style near the fountain.


I’m a big fan of the Lee Brothers cookbooks, the source of the crab salad portion of this recipe. It comes from the Lee Brothers SouthernCookbook, which I came across at Zingerman’s Roadhouse during brunch with my grad school friend Jen. Our outstanding waiter offered to have the Lee brothers sign my cookbook and send it along to me later, since they were going to be a theme event later that week; I’m only sorry that I missed the event, because I had no idea what I huge fan of theirs I was about to become.  I was going to say this is my favorite recipe, but I love the pimento cheese. And the collard greens. And the corn macque choux. And the fried chicken. And the sour orange mojitos. Everything I’ve tried from this cookbook, in fact, with the notable exception of the Cheerwine cocktail; there’s not enough gin in the world to make that stuff taste good.

As for the rest of the ingredients – well, this would be even more amazing between two slices of challah, which is not on the GF-approved list of foods; and of course, use the best-quality bacon you can find.

Crab Salad BLTs

For the crab salad:

6 oz. crabmeat (get the really good stuff from the seafood counter – trust me on this)
3 tablespoons mayonnaise
2 tablespoons fresh lime juice (worth the bother of juicing the lime, in this case)
3 tablespoons finely diced red onion
1 ½ teaspoons minced fresh tarragon
Salt and pepper to taste 

For the sandwiches:

2 slices bread per person, toasted, or a good-quality roll
3 pieces good-quality bacon, cooked and drained
Leaf lettuce
Tomato slices


Mix all the crab salad ingredients together and salt and pepper to taste. When you assemble the sandwich, put the lettuce next to the bread so the mayo doesn’t soak through and ruin your bread; you’re going to want to eat this slowly and enjoy every bite. If you’re picnicking, pack all the ingredients separately and assemble right before you eat, which isn’t nearly as big a bother as it sounds. 

Saturday, June 14, 2014

I Can't Believe We Made It To the End of the School Year: Baked Kibbeh with Onion Topping

Yesterday was the last day of the school year, and the intense two-week sprint to the finish line has left all of us exhausted (science projects! research papers! catching up on an entire quarter of math homework! and fun fun fun in the form of events that require me to drive up to school fifty times a day). Yesterday was also my husband's birthday, and I wanted to make him a nice dinner that really didn't require a lot of effort on my part, because it was a busy day and I'm tired and it took less than 3 hours before we experienced The First Pre-Teen Hormonal Meltdown of the Summer. Kibbeh to the rescue! 

Kibbeh is one of my favorite foods, in all its forms - and there are many, many forms to choose from. The little football-shaped version you get at Middle Eastern restaurants is excellent but there's no way I was frying anything; our microwave broke recently and we have an interim one that sits on the countertop and takes up all the space next to the stove, so setting up a rack to drain them was out of the question. I can't find my usual layered baked kibbeh recipe. I didn't think my kids or in-laws would appreciate the raw version (although that was about the level of effort I felt up to at 5 p.m.).

This version came to the rescue: a baked kibbeh that goes into the oven in about 2 minutes and looks gorgeous when it’s done, thanks to the carmelized onion topping. I’ve seen a number of versions online and have fiddled with it enough that I can make it without looking at someone else’s recipe; it’s a great go-to when I want something a little bit fancy without a ton of work or a trip to the grocery store. I’ve also cut this into little squares and served it as an appetizer, sort of like a meat bruschetta. Which actually sounds kind of gross, now that I think about it.

Feel free to substitute coarse-ground bulghur if you’re so inclined. I’ve found that I actually prefer kibbeh made with quinoa as it’s a bit more flavorful than wheat; cook it in advance and keep it in the fridge, and you can have this ready to go in the time it takes your oven to heat up.

Baked Kibbeh with Onion Topping


1 lb. ground lamb
¾ - 1 cup cooked quinoa
3 large onions
1 teaspoon cinnamon, divided
½ teaspoon allspice
½ - ¾ cup pine nuts
½ cup currants
2 tablespoon pomegranate molasses
Salt and pepper
Olive oil

Preheat the oven to 375.

Put one of the onions in the food processor and chop finely. Add the meat, quinoa, ½ teaspoon of cinnamon, and some salt and pepper and process until the mixture is very soft and pasty; this takes longer than just processing it until it’s combined.

Pat the meat mixture evenly into a pan; if you have a large springform or tart pan (at least 10” in diameter), feel free to use that, otherwise a large rectangular Pyrex baking dish will work just fine. Drizzle a couple of teaspoons of olive oil over the top and spread it evenly, then bake for about 30 minutes.

While this is baking, heat a few tablespoons of olive oil in a large skillet. Slice the remaining two onions thinly, then cook in the oil until they are very soft and well-browned (similar to the topping for mjadara). Add the pine nuts, currants, remaining ½ teaspoon cinnamon, allspice, salt, pepper, and pomegranate molasses, then stir and cook for another few minutes.

Take the meat out of the oven. Cut the meat into wedges or squares (depending on what shape pan you used) and put on a serving platter of some kind. Put a portion of the carmelized onion mixture on top of each piece and serve. Good hot or room temperature.


Sunday, June 1, 2014

Welcome to Summer: Totemic Potato Salad

I don't generally consider myself to be A Food Purist, but there is only one right way to make potato salad. We had friends over for a dinner last weekend in which the Famous Morey Potato Salad played a starring role; since I've spent the better part of this weekend with those same friends AND summer has finally arrived for real, this seemed like a good time to share the recipe. I've made this on so many occasions and for so many different people that it's practically become totemic. Even people who think they don't like potato salad often like this one (if you're one of those people who thinks you don't like potato salad, I hope you're not confusing this with that nasty-ass stuff from Gordon Food Service, which can only be called "potato salad" in the furthest reaches of the marketing department's imagination.) 

I was going to take a picture of the potato salad but we ate it all.
The real deal is simple enough to make, even for a crowd (personal record: 80). My 40th birthday was an excuse to buy an enormous metal bowl that I refer to as the Cauldron of Awesomeness, specifically purchased so I can make sufficiently vast quantities when called for. It holds 20 pounds of potatoes with enough room to stir comfortably; is big enough to bathe the dog in (not, however, at the same time); and bringing it up from the storage shelf in the basement invariably means fun is afoot. 

Obviously I have no way of knowing what size recipe you'll need for your own summer fun, so I'm listing the ingredients per pound of potatoes. Scale accordingly. A few tips about ingredients: 
  • Redskin potatoes are really the best here. You can substitute Idaho potatoes if you need to, but the texture and flavor aren't the same. If you do substitute, peel the potatoes before cooking them. 
  • Use Hellman's, please (unless you're making your own mayonnaise, which is freakin' awesome). Miracle Whip is not mayonnaise. I don't know what it is, exactly, but it's not mayonnaise. 
  • You can use white vinegar if you don't have cider vinegar. 
  • Mustard has no place in this potato salad. Nor do chopped bell peppers, pickle relish, garlic salt, pimentos, carrots, parsley, dill, Ranch dressing, cornstarch, butter, evaporated milk, bacon, cheese, horseradish, or any of the other weird ingredients I've seen. 

Famous Morey Potato Salad

For each pound of redskin potatoes:
3-4 green onions or 1 small white onion
1 large stalk celery
1 hard-boiled egg
1/2 cup Hellman's mayonnaise
splash of cider vinegar

Boil the potatoes until a fork goes in easily, then drain and cool. When the potatoes are cool enough to handle, peel off as much of the skin as you easily can and cut the potatoes into cubes. They don't need to be diced - this is not a delicate dish! - but you want to be able to get more than one piece of potato on your fork at once. 

Mince the onion and celery and add it to the bowl with the potatoes. Cut the egg in half, put the yolk in a small bowl, and chop the white. Add the chopped egg whites to the potatoes, then salt and pepper to taste.

Mash the yolk with a fork, then add the mayonnaise and a splash of vinegar. Mix well, then dip a potato cube in for a taste test. It should be creamy and eggy with just a little bit of tang from the vinegar; add more mayo or vinegar to suit yourself.

Add the mayo mixture to the potatoes and mix well. It should be a little gloppy at this point, since the potatoes will absorb some of the dressing. If you need to make more dressing, I highly recommend mixing it in the small bowl first and adding a little at a time.

Friday, May 9, 2014

Number One Granddaughter Makes Almond Boneless Chicken

I spent a lot of time with my grandfather when I was growing up. I seem to recall he was a meat-and-potatoes kind of person, but every once in a while we’d venture down to Kow Kow Inn for Chinese food. The head waiter was a man named Kenny who could never remember the names of my many aunts and uncles, but had a flawless memory for their birth order. A big night out could include Number One Son, Number Eight Daughter, Number Nine Daughter, Number Ten Son, Number Fourteen Daughter – and of course, me: Number One Granddaughter. While I was certainly not the first-born of my generation (I think I’m actually Number Eight), Kenny knew where I ranked in my grandfather’s heart. Family dynamics like this are a therapist’s meal ticket, but hey – everyone gets to be someone’s favorite something at some point, and I got to be Grandpa’s.

I was not an adventurous eater as a child. I always got the exact same thing: egg drop soup (how this was OK to a picky kid still mystifies me), an egg roll, and Almond Boneless Chicken. Much as I love sweet-and-sour pork and lo mein and beef with broccoli and General Tso’s Chicken and anything at all that involves a noodle, Almond Boneless Chicken is comfort food. It’s probably been 8 years since I ordered this at a restaurant, but knowing that it’s now off-limits means that I started longing for it.

Ah, how did we cook before the Internet? A quick Google search and – hey! Did you know this is a Michigan thing? Because I certainly didn’t. Like I didn’t know that you can’t get a coney dog in Baltimore, and people in other states think that Canada Dry is actually ginger ale when we all know that Vernors is the real deal. I wasn’t surprised to find that Almond Boneless Chicken is as Chinese as chop suey (i.e., not at all) but I didn’t realize it was a regional dish.

This recipe is adapted from one that appeared in the DetroitFree Press in 1979, and which has been duplicated in every single recipe I was able to find online. I guess there’s just the one way to make it…. I modified it a bit since I was too lazy to chop vegetables and didn’t remember seeing any in the sauce I grew up with. 


Almond Boneless Chicken 

2 whole boneless skinless chicken breasts, cut in half, then split in half (otherwise they’re too thick to cook quickly, and there is no way I was pulling out a mallet to pound them thinner)
1/2 teaspoon kosher salt
1 tablespoon dry sherry

 Sauce

4 tablespoons cornstarch
3 tablespoons water
3 cups chicken broth
1 ½ tablespoons coconut oil (or butter, if you use dairy)
2 teaspoons reduced-sodium soy sauce
1 teaspoon oyster sauce
3 tablespoons chicken bouillon granules or the equivalent amount of hard-to-unwrap little cubes (guess which kind I have?) 

Batter

3 tablespoons cornstarch
3 tablespoons rice flour
1/2 teaspoon baking powder
1 egg, beaten
1-2 tablespoons water
Oil for deep-frying 

For Serving

1 cup shredded lettuce
1/3 cup toasted, slivered almonds
1 green onion, finely chopped (green and white parts)

Sprinkle the chicken with salt and sherry and marinate for 15 minutes.

While chicken is marinating, make the sauce. In a medium saucepan, mix together the cornstarch and water until smooth. Gradually mix in the chicken broth, coconut oil or butter, soy sauce, oyster sauce and bouillon granules/cubes. Bring the mixture to a boil, stirring constantly, and let boil for 1 minute. Turn off the heat and put the lid on the pan to keep it warm. If you're serving this with rice (and why wouldn't you?) this is a good time to start the rice cooker. 

In a small bowl, whisk together the cornstarch, rice flour and baking powder. Add the egg and 1 tablespoon of water and beat until smooth. If it’s the consistency of frosting, add another tablespoon of water.
Pour ½ inch of oil in a wok or large skillet (I used cast iron) and heat to 375 degrees. Dip the chicken in the batter, letting the excess drip back into the bowl, and fry until golden, turning once.  This took about 7-8 minutes per batch; don’t crowd the pan too much or the coating will get oily and soggy. Put the cooked chicken on a rack over some paper towels to drain.

Cut the chicken diagonally into strips, pushing the strips back together in more or less in the same shape. Place the shredded lettuce on a platter, put the chicken on top of the lettuce, and pour the sauce over the top. Garnish with the almonds and green onions.

Note that this breading does NOT keep well in a warm oven; have your rice and any side dishes ready to go when you start frying the chicken. Wait until right before you serve it to do the slicing and it will stay plenty hot.

Thursday, May 1, 2014

I Know the Recipe is Around Here Somwhere..... Polenta with Sausage and Artichokes

I’d probably enjoy eating a completely different meal every night if I didn’t have to deal with other people’s tastes. In spite of the fact that I ate the same 4 things over and over again the entire time I lived alone, I like to imagine that if left to my own devices now, I would be infinitely creative. Also I would never be lazy. Also my fridge and pantry would magically restock themselves with whatever esoteric ingredients I needed. And the dishes would wash themselves.

In the Actual World I Live In, we sometimes fail to plan and/or shop, we fall into ruts, and we lack imagination. Sometime we’re just tired. That’s when the Coffee Can comes into play.

Have I mentioned the Coffee Can? I got the phrase from a Cooking Light reader suggestion; the author of the letter said that she and her family wrote down all their favorite recipes and put them into an actual coffee can, and whenever they couldn’t decide what to eat they pulled out the name of a favorite meal. Genius! 

The recipes are in here...somewhere
Our house being what it is, we have a virtual coffee can which resides on one of David’s many electronic devices. I have absolutely no idea which device it’s on or how to locate the recipes it contains, but I take a certain comfort in knowing that all our favorites have been captured - somewhere - for posterity. (Should, god forbid, anything happen to my husband, we’re going to be starting from scratch.) In the meantime, he occasionally pulls up past favorites that make it into the regular dinner rotation; this is one of those favorites. We almost always have the ingredients on hand, and you can have it on the table within 30 minutes of the time you walk through the door.


It originated in Everyday Food magazine, a Martha Stewart publication that I absolutely adored. I actually love everything Martha touches; I have a very unhealthy one-way relationship with her that will undoubtedly be explored in a later post. Suffice to say that when Sirius XM discontinued her radio station I felt that I’d lost touch with a friend (cut me some slack, I used to drive a lot for work and Martha and I put in a lot of miles together). The full version of Martha Stewart Living Magazine has been getting a little light on content, and the previously-marvelous Everyday Food has dwindled into a 20-something-page extra packaged with the other magazine instead of being sold by its own nifty self. Alas. But that’s what back issues are for, right?

Baked Polenta with Sausage and Artichokes

2 teaspoons extra-virgin olive oil
1 small white onion, sliced
1 lb. sweet Italian sausage (with the casings removed if you can’t find it in bulk)
2 cloves garlic, minced
1 can quartered marinated artichoke hearts
Salt and pepper
1 18-oz. tube prepared polenta
1/3 cup chicken stock

Preheat oven to 400.

In a large skillet, heat the oil and cook the onion until softened, about 5 minutes. Add the sausage and cook until browned, about 8 minutes. Add garlic and stir. Remove the skillet from the heat, stir in the artichokes, and season with salt and pepper.

Slice the polenta into ¼-inch rounds (you can also make your own polenta for this, which makes the recipe considerably less convenient). Layer the rounds with the sausage mixture in a 2-quart baking dish, preferably the one your husband took to a church potluck and never got back, and which has been discontinued by the short-sighted people over at Corningware.  Pour the stock over the top and bake about 20 minutes, until the whole thing is bubbling and the polenta is starting to get some crispy bits on the edges.

The last time we made this, we decided that we need to start making double batches. It fed the four of us (probably only because John decided he hated polenta that day) but there wasn’t a single crumb left over. If there had been more we probably would have kept going, and we like to have leftovers for lunch the next day. Just use a bigger baking dish.


Wednesday, April 30, 2014

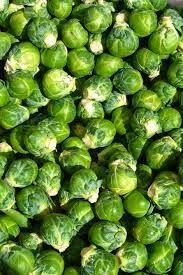
Nothing Like a Deadline to Inspire Me: Brussels Sprouts with Pomegranate

Blogging has been a great way for me to rediscover my writing voice – I’ve wanted to be a (full-time, professional, PAID) writer since I was approximately 6 years old. After hanging on to this idea for a couple of decades, I somehow lost sight of this ambition in my twenties (ironically, the era of my life when I was a full-time, professional, paid technical writer. Maybe all those software instructions just sucked the creative juices out of me. Imagine that.).  At any rate, blogging has been a nice gateway drug back into the writing life. It’s led to some other projects that I’ve enjoyed very much and generally made me feel happy about having some creative output that doesn’t (1) get eaten and disappear forever or (2) require any sort of cleaning up afterwards.

My current relationship with goal-setting is far too complicated for this post; suffice to say that I’ve tried to take a systematic, planned approach to integrating my writing into my regular life, complete with editorial calendars and timelines and to-do lists, etc. As a result, I have blogged less in the last 2 months than I have in the last 2 years. It’s inevitable that I was going to post something today, because it’s the last day of the month and I’m looking at how little progress I’ve made towards the written goals which allegedly are supposed to keep me accountable. Clearly it’s time for a new system.

Wondering what the quilt looks like?
My personal How I Wish I Was Spending My Time trifecta is Cook – Craft – Write (not necessarily in that order), and it appears that I can sustain 2 at a time. The last couple of months have included a lot of cooking and I finally finished the quilt for my friend’s soon-to-arrive baby, so writing has fallen by the wayside. I just got a couple of new craft magazines and inspiration for another writing project, so odds are good that David is taking over the cooking as soon as he gets through finals week, and I’ll be blogging about what an amazing cook he is.

This particular recipe is a dish I took to a Seder that we attended earlier in the month. Potlucks are always a huge bummer, because we inevitably can’t eat 99.9% of what’s there and it makes us collectively feel very sorry for ourselves. The recipe comes from the amazing and wonderful Tori Avey, who writes as The Shiksa in the Kitchen and also as The History Kitchen (a marvelous way to lose a couple of hours – such fascinating stuff!). We love Brussels sprouts and we love pomegranates, and this looked very pretty on a white serving platter with toasted walnuts sprinkled all around.


Roasted Brussels Sprouts with Pomegranate Molasses

2 lb. Brussels sprouts, or however much is on the stalk or in the container you pick up in the produce department
¼ cup olive oil
Salt and pepper
1 cup walnuts, toasted (don’t skip the toasting!)
2 tbsp pomegranate molasses
Fresh pomegranate seeds, optional (this is for the garnish. I couldn’t find any actual pomegranates so we skipped it and everyone was still perfectly happy with the end result)

Preheat the oven to 450 and cover a cookie sheet with aluminum foil.

Wash the sprouts and cut them in half, then toss with the olive oil and salt and pepper to taste. Roast 15 minutes, until they are barely tender and some of the outer leaves are starting to crisp up.

Toss the sprouts with the walnuts. Pour onto a serving platter, drizzle with the pomegranate molasses, and sprinkle with the fresh pomegranate seeds, if you’re using them.

This dish holds well at room temperature and tastes just fine a couple of hours later. We put it in the warming oven for a bit, but I don’t think I’d necessarily recommend that because the sprouts got more cooked than I like. If you make this in advance, just give it time to come to room temperature rather than blasting it with the microwave – although it really is easy enough that you could make it at the last minute.


Friday, April 11, 2014

Pasta Primavera, or It Can't Be FroYo Dinner Every Night, Kids

We’ve been enjoying a family staycation this year during the kids’ spring break. If Imaginary Mom was in charge of things, each night would feature a new and exciting – and delicious! – dinner with fresh seasonal ingredients, prepared in my spotlessly clean gourmet kitchen. Because *I* am in charge instead, last night we had FroYo for dinner. 

The one night I was organized enough to produce dinner after a long day of family fun, we had this, our very favorite springtime dish. We invariably make it on the first warm sunny day of the year, either by accident or design. The ingredients are things we typically have in the fridge, and the whole thing comes together in the amount of time it takes to boil water for pasta – perfect for those days when you can’t bring yourself to come inside and cook until the kids are ready to gnaw their own arms off. 

I could wax poetic about all the possible variations on the ingredients, but it’s the last weekday of staycation and we’re off to do more fun things. Suffice to say that you want to limit yourself to 3-4 vegetables, and use spring-y ones – by this time of year we should all be sick and tired of broccoli and cauliflower and potatoes and squash. If Imaginary Mom had a vegetable garden, she’d go out back and harvest something to throw in here, but I think we’ve established that her crazy overachieving self is not running the show around here these days.

Pasta Primavera

1 ½ cups chicken broth
2-3 sprigs fresh thyme
2 carrots, peeled and diced
8-12 stalks asparagus, broken into 1-inch pieces
1-2 zucchini or yellow squash, diced
1 cup frozen peas
2 tablespoons olive oil
1 lb short pasta
Parmesan cheese, for serving

Put a pot of water for the pasta on to boil. 

In the meantime, put 1 cup of the chicken broth and the fresh thyme in a skillet large enough to hold the pasta. Bring it to a simmer, then add the carrots and cook 2 minutes. Add the asparagus and cook and other 2 minutes. Add the squash and cook 4 minutes.  The broth should be just about cooked away at this point; add the olive oil and stir, then add the peas and cook until they’re thawed and just barely cooked.


In the meantime, cook the pasta as soon as the water boils. Drain well and add to the skillet, along with another ½ cup of broth. Stir to combine, add salt and pepper to taste, and serve with Parmesan cheese on the side. 

Saturday, April 5, 2014

Breakfast of Champions: Lemon Rice Soup

Well, now - this is embarrassing. I jotted down the ingredients for this recipe, which I'm always losing in my file, and saved it as a draft.....except I actually published it. Oops. No instructions, no snappy commentary at the beginning, just 4 ingredients with no explanation whatsoever. Note to self: Pay attention. So here it is again, with a little more useful explanation.

We now return to our regularly scheduled blogging.

My kids love eating at this little diner near our house. The food is nothing particularly special, just your standard Metro Detroit Greek-ish place that's a step up from a coney, but there are huge windows on 3 sides of the restaurant so you can watch all the goings-on while you eat (which is either distracting or exciting, depending on how you look at it). I also think they love it so much because you can get any menu item at any time of day, which means that their desire to eat lemon rice soup at breakfast can be easily accommodated when the grownups want omelettes.

Jen, this post was bit of a lemon!
This is one of my very favorite soups, but not every coney serves it, the quality isn't consistent, and we're never entirely confident that it's safe for David and John to eat. I have a big file of recipes I've collected from random places over the years; this came from the Detroit News Lifestyle section sometime in the late 80s. It's so completely perfect that I've never seen a need to alter it, just a bit of salt and pepper at the end.

It is a bit of a princess, as soups go - you can pretty much ignore it at the beginning, but the egg and lemon part takes a bit of fussing and you have to be careful to keep the heat low or you'll cook the eggs (in an icky way). That little bit of bother is more than balanced out by the absolute simplicity of the ingredients; you don't have to chop a single thing.

Lemon Rice Soup

6 cups chicken broth
1/2 c. rice
1/4 cup lemon juice (from an actual lemon - if you use bottled lemon juice you'll be sad when it's time to eat this)
3 eggs

Bring the broth to a boil in large saucepan. Add the rice, reduce the heat, and simmer about 20 minutes, until the rice is very tender.

In a very large measuring cup, whisk together the lemon juice and eggs. When the rice is done, slowly add about 1/2 cup of the broth to the lemon-egg mixture, stirring the entire time. If you rush this step, the egg will start to cook and the soup will look extremely gross; take your time and go slowly.

Once the broth, lemon, and egg are mixed, slowly pour the mixture into the saucepan, stirring constantly. Add salt and pepper to suit your own taste - is it lemony enough? add a little more lemon juice if you need to - and serve immediately. I suggest eating it all in one sitting since it never seems to reheat well.

Note: If you go too quickly with the pouring and stirring and end up with grody eggy clumps or strands in your soup, get out your immersion blender (which is a really handy thing to have around the kitchen, and has saved me from getting burned putting soup into my blender) and blend the heck out of this, then pour it through a strainer before serving (yes, it's a bit of overkill but I really don't like egg clumps in my soup). You'll end up with a thick soup with no distinct rice bits, but it will still taste very good.

Lemon-Marinated Chicken, or What To Make For a Crowd Without Giving Yourself a Panic Attack

March was a rough month around here.  The four of us passed around the same horrible virus again and again, and we were all at various stages of sick for the entire month. We missed our annual spring celebration. We missed making corned beef for St. Patrick’s Day. And we sure didn’t make any great dinners (well, OK – one great dinner. But it was for other people and they paid to be here and we planned it back in November), so we’ve mostly been having the same 4 things over and over again. Nobody could taste anything so cooking felt pretty pointless.

I emerged from the fog of the Nyquil fumes and realized that the lunch I volunteered to cater for the volunteers at a church fundraiser was just around the corner. I like cooking for an appreciative audience and the request was made before I got sick, but naturally I didn’t plan the menu in advance. Given all the constraints – time, money, and what was humanly possible given all the other things I was catching up on that weekend – this recipe seemed to fit the bill. It’s from my Banrnes-and-Noble-bargain-rack-surprise-favorite, The Food and Cooking of the Middle East, which I’m so glad I bought and which has never disappointed me.

The only hard part about this recipe is remembering to marinate the chicken in advance. I don't think I'd marinate it overnight for dinner the next day – I don't want the chicken to get mushy – but marinating the night before for lunch seemed just right; if I made this for dinner I’d throw it together in the morning (yes, it's that easy) before I left for work.

I served it with mjadara, fattoush, and David’s excellent hummous, which made the omnivores AND the vegans happy.  It scales up very, very easily – it was no more work to make this for 40 people than it was to make it for 4, really. 

Lemon-Marinated Chicken 

2 whole  boneless skinless chicken breasts, trimmed
3 tbsp olive oil
3 tbsp lemon juice
2 tsp cider vinegar
2-3 cloves of garlic, crushed
1 cinnamon stick, broken in half
Grated rind of ½ orange
6 cardamom pods, crushed

Mix together the ingredients for the marinade. Pour over the chicken and refrigerate for at least 6 hours.
Preheat the oven to 350. Put the chicken in a baking dish (if you’re scaling this up, make sure your pan is big enough to hold the chicken in a single layer) and bake for 20 minutes, basting occasionally with the marinade if you’re so inclined (I was not).

Take the chicken out of the pan and shred or chop coarsely. Return it to the baking pan, stirring in any marinade remaining at the bottom of the pan, and return to the oven for 10 minutes. (If you happen to be in a commercial kitchen with a warming oven available, put it in there to hold instead).


This is delicious as-is. The original recipe has it served in pita, with a tahini dressing drizzled over the top and pickled vegetables on the side. You could serve it on fattoush for a healthy-ish main dish salad, or dip the pieces in hummous when you're too lazy to chop more carrots or bother with a fork. 

Monday, March 31, 2014

So Easy, It's Barely Even a Recipe: Seethed Potatoes

The entire month of March has disappeared in a haze of Nyquil fumes. If someone were to hold Family Olympics, our 4-person team would completely dominate the Synchronized Coughing event. We missed several March traditions - celebrating the first day of spring and making corned beef for St. Patrick's Day, among others. And I've missed the blog. Now that we seemed to have turned a meteorological corner into spring, it's clearly time for some new material.

This particular recipe came up in conversation with my friend Andrea last week, and I'm so glad it did because now I've remembered how much I like it and how very, very easy it is. Now that David is in school two nights a week, I get a chance to sneak in the occasional potato dish; I'm guessing this will go back into the regular rotation, since you can mostly ignore it while you stay on top of the nightly homework nagging. 

I found this recipe in One Potato Two Potato, a wonderful cookbook that deserves better than to be gathering dust on my bookshelf. 

Seethed Potatoes 

Fingerling or other small potatoes
Peeled whole garlic cloves 
Olive oil or butter
Water 

I can hear you now: "Jen, this is a lame excuse for a recipe. How about some amounts? You're listing water as an ingredient? I know you've been sick but jeez, a little effort maybe?" 

Ha! I say. Read on. 

Wash the potatoes and put them in a skillet large enough to hold them in a single layer. Add enough water to cover the potatoes, add some garlic, and put in a hefty glug of olive oil or a chunk of butter (guess which one I prefer?). The packages of fingerling potatoes at the grocery store or the pint containers at the farmer's market are a good size for our family; I use 2-3 garlic cloves and a couple of tablespoons of oil, but this is one of those recipes that can scale up or down very easily. 

Bring the water to a boil, then turn the heat down and simmer until the potatoes are tender and the water is just about boiled away. Turn the heat up to medium-high and cook the potatoes, shaking the pan every minute or so to keep them from burning to the bottom of the pan and, more importantly, coating them with the butter or oil. This entire process takes around 45 minutes or so; if you're grilling, put the potatoes on right before you start the grill and the timing should work out just about perfectly. 

Sprinkle with kosher salt and serve immediately. 

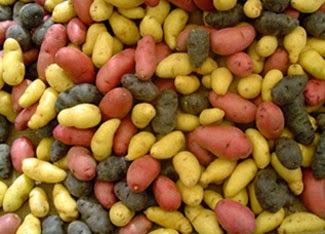
The first time we had these was a revelation - the skins were crisp and salty, the insides were creamy and perfectly cooked, and I didn't have to stand in the kitchen (much) on a hot day. If you've been lucky enough to find mixed heirloom potatoes, the different shapes and colors look very pretty in the serving bowl, and possibly your 8-year-old son will think that eating purple potatoes is the awesomest thing ever. 

Thursday, February 27, 2014

The Chili of Champions


Looking at the blog posts from this month, I realized that it’s pretty much all noodle dishes and squishy comfort foods – since we’ve been getting up close and personal with the polar vortex AGAIN, that’s not likely to change soon. This is the most absolutely interminable winter I can ever remember, and I’m not just saying that because some part of me has been injured or broken or immobilized since the first snowfall. 

But into even the gloomiest of seasons some sunshine must appear! Yes indeedy, I WON the chili cook-off at church. This was not at all a given, because these people can seriously cook; and while David has used this recipe several times in the past and won, I never have. It was time. I was due.

Once upon a time I was an absolute devotee of Cooking Light magazine (and I still check their annual cookbook when I’m looking for menus, inspiration, and quick dinner ideas. I’d absolutely recommend a subscription to anyone), which is where this recipe originated. I’ve adapted it a bit for my own personal taste, which mostly means taming down the heat a bit – and I have the straw sombrero to prove this is a winner!

Champion Chili


1 lb. chorizo sausage, casings removed
2 pound stew beef, cut into 1-inch pieces
2-3 large onions, chopped
6 cloves garlic, minced  
1 can chipotle chiles in adobo sauce (you won’t use the whole thing)
1 8 oz. can tomato puree  
3 teaspoons sugar
Salt to taste
3 teaspoons unsweetened cocoa
2 teaspoon ground coriander
2 teaspoon dried oregano
2 teaspoon ground cumin
1 cup red wine (I used one of those teeny little grocery store bottles of Merlot – they often sell them in large bins stuck in random spots, or in 4-packs, and I keep them on hand for cooking on the off chance that we don’t have an open bottle of wine)
A big splash of fresh lime juice (the original recipe calls for ¼ cup, which seems about right)
1 28 oz carton of beef broth
1 28 oz can of whole tomatoes
3 tablespoons masa harina
2  15 oz cans pinto beans, rinsed and drained
1  15 oz can black beans, rinsed and drained

Heat a large splash of olive oil in a Dutch oven over medium-high heat. Add the chorizo to the pan and brown; remove from the pan. Working in batches, brown the stew beef and remove it from the pan when it is well browned.  Add the onion and garlic to pan and sauté until the onions are well-browned, 5 minutes or more.

Remove 3 chiles from the can and chop them. Add the meats, chiles, a big dollop of the adobo sauce from the can, the tomato puree, sugar, cocoa, and spices to the pan and cook, stirring, for a couple of minutes. Add the wine, lime juice, and beef broth.  Use kitchen shears to chop up the whole tomatoes (do this while they’re still in the can – it’s a lot less mess) and add the entire can to the pot. Bring to a boil, then reduce the heat and simmer for an hour. 

Check the seasonings. It should be a teeny bit hotter than you want the end result to be, since the remaining ingredients will mellow it out a bit. Stir in the masa harina. Add the beans, return to a boil, then cover and reduce the heat. Simmer another 30-45 minutes. Check the seasonings again and adjust as you see fit. Revel in the sweet taste of victory.